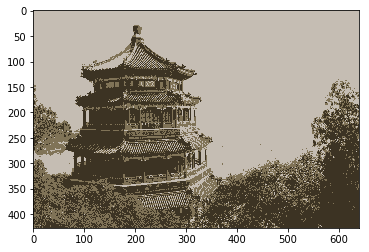
前一篇文章介绍了Sklearn中KMeans算法的基本使用方法,并用乳腺癌数据集对KMeans的属性和常用方法做了演示。本文我们要介绍一个KMeans的高级用法,对图片进行矢量量化操作,即在尽量不损失图片质量的情况下,压缩图片大小。

1、加载数据并可视化
from sklearn.datasets import load_sample_image
import matplotlib.pyplot as plt

image = load_sample_image('china.jpg')

# print(image.shape) #(427, 640, 3)
# plt.imshow(image)
# plt.show()
2、像素点归一化、去重
import pandas as pd

# 归一化
image_norm = image / image.max()
# 保留3通道
image_arr = image_norm.reshape(-1, 3)
# print(image_arr) #(273280, 3)
# 像素点去重
px_uni = pd.DataFrame(image_arr).drop_duplicates()
# print(px_uni.shape) #(96615, 3)
3、KMeans找质心
from sklearn.utils import shuffle
from sklearn.cluster import KMeans

# 定义聚类簇的数量
n_clusters = 64

# 随机取前2000个点
px_sample = shuffle(px_uni, random_state=42)[:2000]
# 以2000个点进行聚类找质心
cluster = KMeans(n_clusters, random_state=0)
cluster.fit(px_sample)
# 质心
centers = cluster.cluster_centers_
4、用质心替换图片像素点
import numpy as np

labels = cluster.predict(image_arr)
# 按索引找到对应质心
image_cg = centers[labels]
# 图片像素还原
image_cg = (image_cg * image.max()).reshape(image.shape).astype('uint8')
5、图片对比
plt.imshow(image)
plt.axis('off')
plt.show()

plt.imshow(image_cg)
plt.axis('off')
plt.show()
本文为 陈华 原创,欢迎转载,但请注明出处:http://ichenhua.cn/read/281
- 上一篇:
- 数据结构之单链表与创建方法
- 下一篇:
- 数据结构之单链表的插入和删除节点


